
Provides screen capture, video capture and audio capture software
Capture Menu
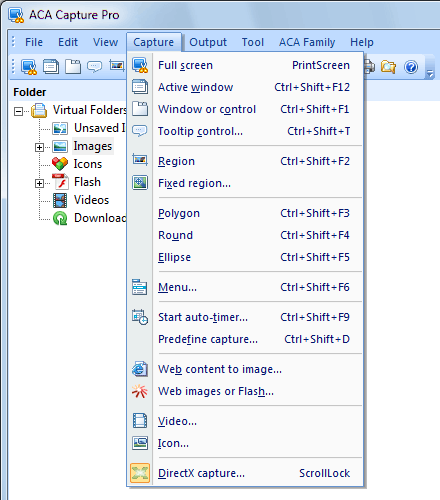
Screenshot: The Capture menu of ACA Capture Pro
- Full screen: Captures the image of the entire desktop and all applications visible on it. The hotkey is PrintScreen.
- Active window : Captures only the "topmost" window, or the window that currently has focus. The default hotkey is Ctrl+Shirt+F12.
- Window or control - Capture an entire window or just a predefined area within a window such as a control or button. When clicked, a cursor
 will appear, and a red blinking frame will appear around the target object.
 - Move your mouse to the object that you want to capture.
- Click with your left mouse button or press Enter key to select and capture the region around which the blinking frame surrounds.
- Click your right mouse button or press Esc key to abort this command.
- ToolTip control: A ToolTip control displays a small pop-up window that contains a line of text that describes the purpose of a tool. They appear automatically, or pop up, when the user pauses the mouse pointer over a tool. To capture a ToolTip control, please follow the steps below:
- Move the mouse pointer over a tool.
- Press Ctrl+Shift+T (the default hotkey for ToolTip capture) when the ToolTip control appears.
- Region: Captures the image from the selected region. When clicked, a large cross cursor
 will appear.
 - Click using your left mouse button to indicate where you want to start the capture area, and then release it.
- Drag the outline to enclose the area you want to capture, the size (in pixels) of the capture will be shown within the help window.
- Click the left mouse button or press Enter key to complete the capture.
- Click your right mouse button or press Esc key to abort this command.
- Fixed region: Captures the image from the region that specified the width and height. When clicked, the Capture Fixed Region dialog opens.
- Input the width and height of fixed region by pixel on the dialog, then press OK button.
- A cursor will appear, and a fixed rectangle will be shown in screen.
- Move the mouse pointer, click the left mouse button or press Enter key when the image to be captured is covered by the rectangle.
- Click your right mouse button or press Esc key to abort this command.
- Polygon: Captures the image from a polygon region. When clicked, a large cross cursor will appear.
- Press the left mouse button or press Enter key to accept the first position.
- Move the mouse pointer to next point, and press the left mouse or Enter key.
- Repeat s2 until complete. Double click the left mouse button to end this screen capture operation.
- Click your right mouse button or press Esc key to abort this command.
- Round: Captures the image from a round region. When clicked, a cursor
 will appear.
 - Press the left mouse button or press Enter key to accept the center of the circle
- Move the mouse pointer.
- Press the left mouse button or press Enter key when the image to be captured is covered by the round.
- Click your right mouse button or press Esc key to abort this command.
- Ellipse: Captures the image from an ellipse region. When clicked, a cursor will appear.
- Press the left mouse button or press Enterkey to accept the first position.
- Move the mouse pointer.
- Press the left mouse button or press Enterkey when the image to be captured is covered by the ellipse.
- Click your right mouse button or press Esc key to abort this command.
- Menu: Shows the help dialog of menu capture. To capture a screenshot from a menu:
- Click the menu that you want to capture, stay on the menu.
- Press the hotkey, the default hotkey is Ctrl+Shift+F6
- Start auto-timer: Enables program to perform unattended captures at intervals that you define.
- Predefine capture: You can predefine a specific part of the screen. When you want to capture echo time, you can directly press the hotkey without selecting the screen area.
- Web content to image: Capture a long WEB PAGE to an image file, even if it scrolls off-screen.
- Click the menu Capture | Web content to image, then type the URL of web page. Ex: http://www.acasystems.com.
- Click the Start button.
- Web images or Flash: Get all images or Flash on a web page.
- Click the menu Capture | Web images or Flash, then type the URL of web page that including the images or Flash. Ex: http://www.acasystems.com.
- Click the Start button.
- Video: Captures the actions from your Windows screen and the the sounds from your Microphone or media player, then saves it as a standard, easily edited, AVI (Audio-Video Interleaved) movie file.
- Icon: Performs fast scan of all local hard disks for icon images.
- DirectX capture: Allows you to capture the DirectX/Direct3D game or video player screen
TIPS: If you want to capture the full screen of game, please use ScrollLock or PrintScreen key, see DirectX/Direct3D and Video Player Capture.
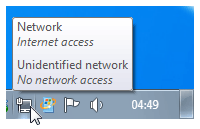
Screenshot: The Tooltip control
The default hotkey is Ctrl+Shift+F2.
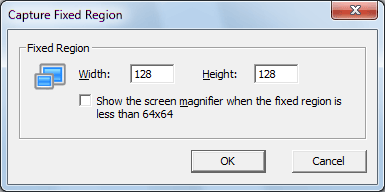
Screenshot: The Capture Fixed Region dialog
The default hotkey is Ctrl+Shift+F3.
The default hotkey is Ctrl+Shift+F4.
The default hotkey is Ctrl+Shift+F5.
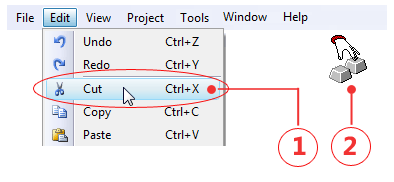
Figure: How to capture a screenshot from a menu
When clicked, the Predefine Capture dialog opens, you can adjust the predefined start X, Y, Width, Height and the hotkey.
The default hotkey is Ctrl+Shift+D.
Note: ACA Capture Pro only captures the standard web images or Flash. It doesn't support for dynamic images or Flash that outputed by IFRAME, JavaScript or CSS.